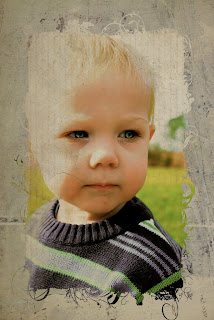

What I did:
1) First I started in iphoto. I typically do the basics in iphoto first, pretty much everything you do in iphoto can also be achieved in photoshop as well. I set the levels to 86% on the light side, and 9% for the darks.
2) Set contrast to -45 and saturation to 96. Check the box that says avoid saturating skin tones.
3) Go to effects in iphoto and set antique to +2, fade color +1, and boost color +2
4) Save the changes and open photo up in photoshop [I'm using CS4]
5) Apply some textures. You can download textures for free here. I am using a texture from one of the fav six minis set. You can download the exact texture here. [The texture I used is the bottom left one]
6) Change blend mode to Darken, then change opacity [to the right of your blending options] to 97% and fill [below opacity] to 80%
7) Lighten eyes. Duplicate image of the child. [This is not necessary but I do it just incase I mess up and can't undo.] Make sure duplicated image is ABOVE original image and BELOW texture image. Get out your dodge tool in the tools palette, put the settings to shadows, exposure 76%. Use a soft brush. make sure your brush is small enough to fit in the iris part of the eye and not go over the pupil or white. Lighten the iris, not too much or you will start seeing pixels. You can go over the dark black circles around the iris as well to lighten them up a bit. Now go to your burn tool and make your brush the size of the pupil. Set exposure to 53% keep at shadow setting and darken the pupil. If you think the eyes are too light you can change you fill to about 90% or until you are happy with the result.
8) Apply border. I got the border here. first I edited it a bit, I applied another texture again from shadow house. That is not necessary. The boarder is white by default, if you wish to change it as I did I recommend editing it BEFORE applying it to your photo. So I pasted the border into the photo ABOVE all the other layers. I rotated it until I got it to fit around the photo the way I want.
9) Submit to iheartfaces
I hope you all have fun fixing photos :] see other entries here!


2 comments:
very creative edit! Love what you did here.
Thanks for editing. It is so creative! I really like it. :)
Post a Comment