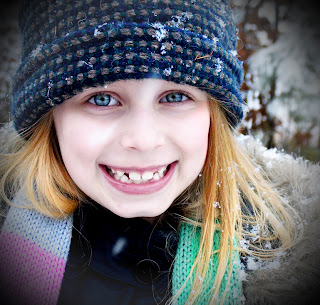

What I did:
1) First take picture into iphoto
2) Crop around face
3) Adjust levels, Make the dark tab [far left] about 4%. Move middle gray tab over the the left a little.
4) Go to effects +1 fade color.
5) Save and go into photoshop.
6) Use perfect portrait action. You can get it free at coffeshop.
7) Adjust levels to taste. I put them at 9, 1.28, and left the white at defualt
8) Select the mask on the WHITE TEETH layer, make sure you're using the brush tool [set to white] and the opacity should be between 20-30. lightly go over the teeth to make them whiter.
9) Go to the mask on WHITE WHITES layer and lightly go over the whites of the eyes. Opacity should again be 20-30
10) Go to mask on the EYE DEFINE layer. I like to have my brush at 100% for this. Adjust your opacity to taste.
11) Go to BRIGHT EYES layer and paint over the iris of the eye with white, I like to have my opacity around 80-100%. Adjust yours to taste. I go over the pupil of the eye (change brush color to black) and darken it a bit after lightening. I keep the opacity around 20% when darkening. You can also go around the black rings around the iris. Keep opacity low when doing this.
12) Go to soft skin layer, the girl already has pretty good looking skin. I'm just going to lightly touch up around her eyes my opacity is at 20%.
13) Lighten lips (optional). I want her lips to be a little paler. So I'm going to the dodge/burn layer, and I'm going to paint very VERY lightly over the lips. I'm using the brush [with white] and the opacity is at 12%. Blend mode lighten. Avoid touching the skin.
14) There is a vignette layer, I am going to duplicate it, change the opacity to 70%, then merge those two layers so the vignette is a little darker. Adding the second layer and merging makes the vignette more pronounced. It will draw you in a little more to her face, I personally like this. Do not merge the vignette if you want a more natural looking image.
15) The sharpen layer is invisible by default. You can keep it and adjust to taste, I didn't use it. I also deleted the urban grit layer.
16) Bring back color: go to the VIVD COLOR layer mask. Select your brush tool [with white] and set the opacity to 100%, blend mode normal. Go over the scarf, hair, and hat to help bring back the color.
17) Save and submit to ihearfaces :]
Check out the other entries here!


No comments:
Post a Comment